ROS 1
加载本地和远程 ROS 1 (.bag) 文件,或直接连接到实时 ROS 1 堆栈。
实时数据
安装 ROS 1,并确保您与机器人在同一网络上。
在 Foxglove 中,在“打开数据源”对话框中选择“打开连接”。
Foxglove WebSocket
我们推荐 Foxglove WebSocket 作为最简单的连接方式——特别是如果您的 ROS 和 Foxglove 之间有网络防火墙,因为它只需要您的 ROS 主机打开一个端口。
此选项需要运行一个额外的 ROS 节点 (foxglove_bridge)——请按照此处的安装说明进行操作。
连接
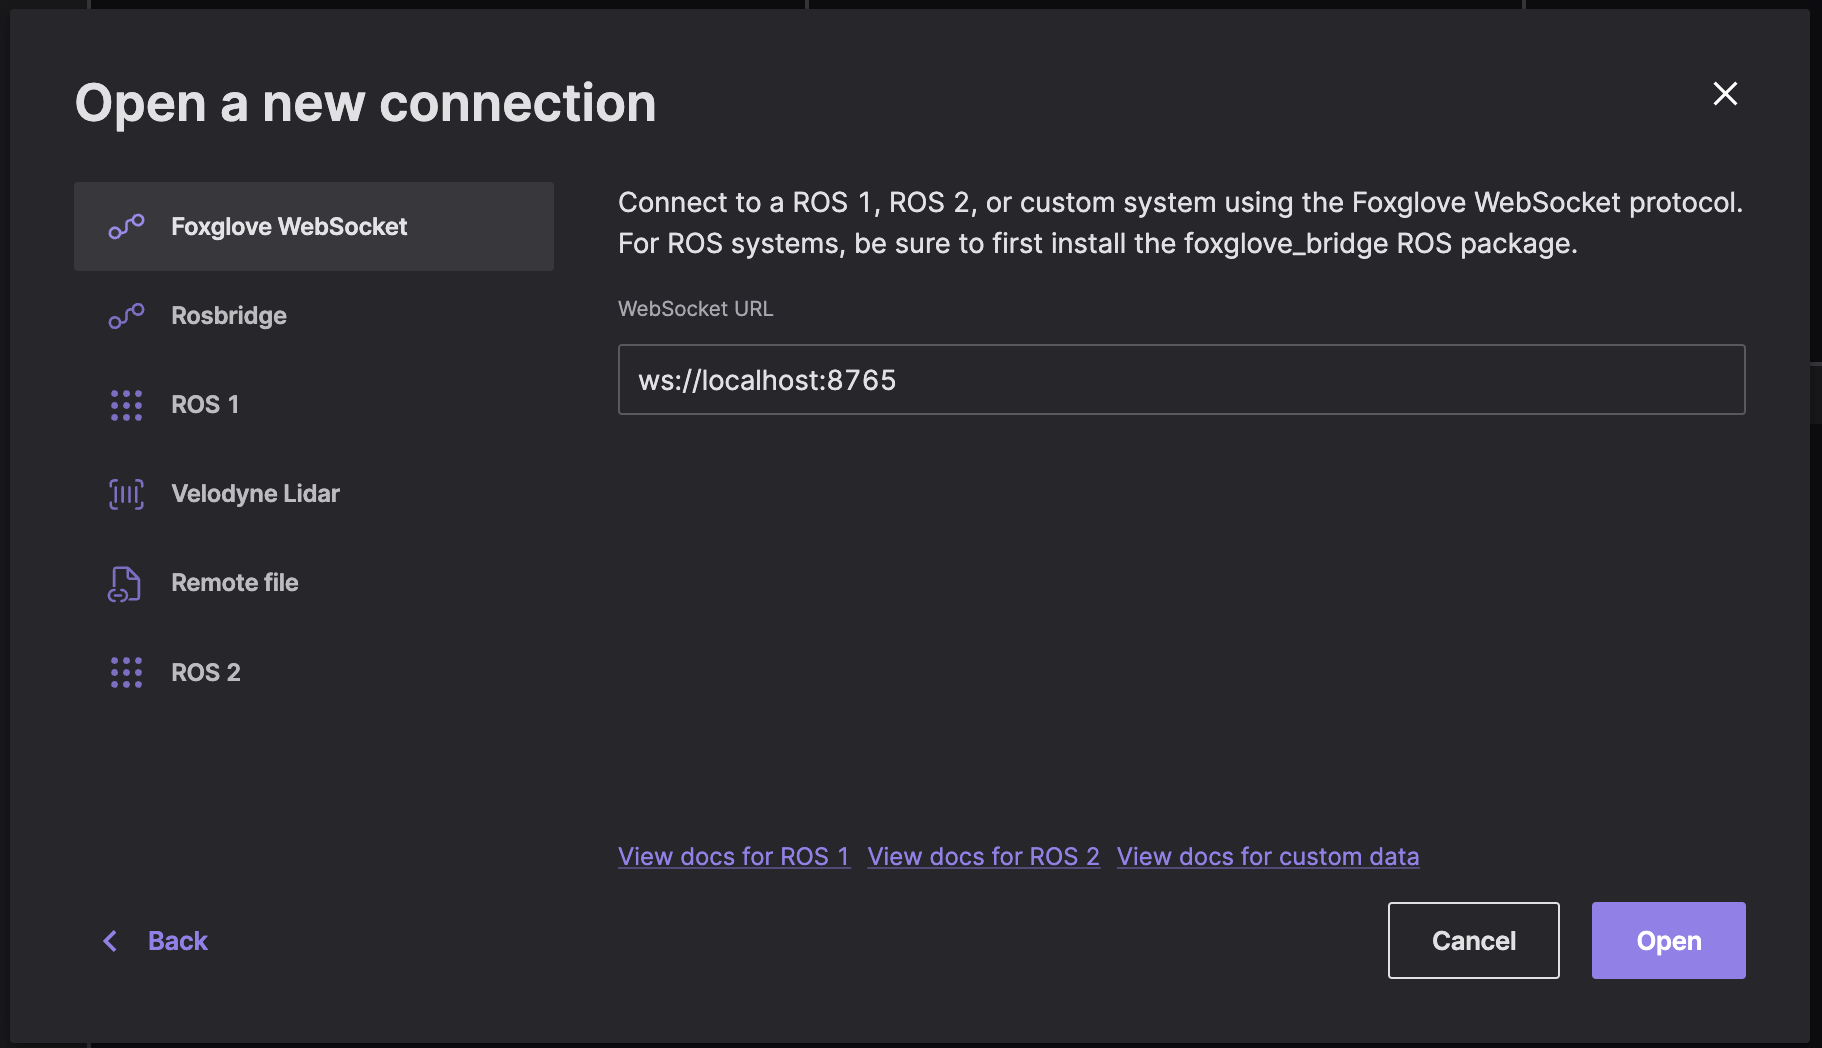
在“打开数据源”对话框中选择“Foxglove WebSocket”,然后输入您的 Foxglove 桥服务器的 URL:
Reset connection
To reconnect to a Foxglove WebSocket in a different context, you must first clear out your most recently visualized data in Foxglove.
To clear the state and reset your visualizations, resend the serverInfo message with an updated value for its optional sessionID field (string value). This lets the Foxglove WebSocket connection know that you are initiating a new connection, instead of trying to reconnect to a dropped one.
限制
Foxglove WebSocket 连接支持发布回您的 ROS 堆栈,以及读取和设置 ROS 参数。
Rosbridge
注意:出于性能原因,我们推荐使用 Foxglove WebSocket 连接。
Connect directly to your running ROS stack via WebSockets using a Rosbridge connection. This connection option requires only a single open port between Foxglove and your robot.
A rosbridge connection uses a standard protocol to connect Foxglove to your ROS master over WebSockets. While it does require running an extra ROS noderosbridge_server, we recommend this option if you have a network firewall between ROS and Foxglove, as it requires your ROS host to have only one port open.
To open a Rosbridge connection, make sure you’ve installedrosbridge-suite
$ sudo apt install ros-noetic-rosbridge-suite // ROS 1 Noetic
Next, start the WebSocket server, and review the command printout to determine the port it is listening on (e.g. ws://0.0.0.0:9090):
$ roslaunch rosbridge_server rosbridge_websocket.launch
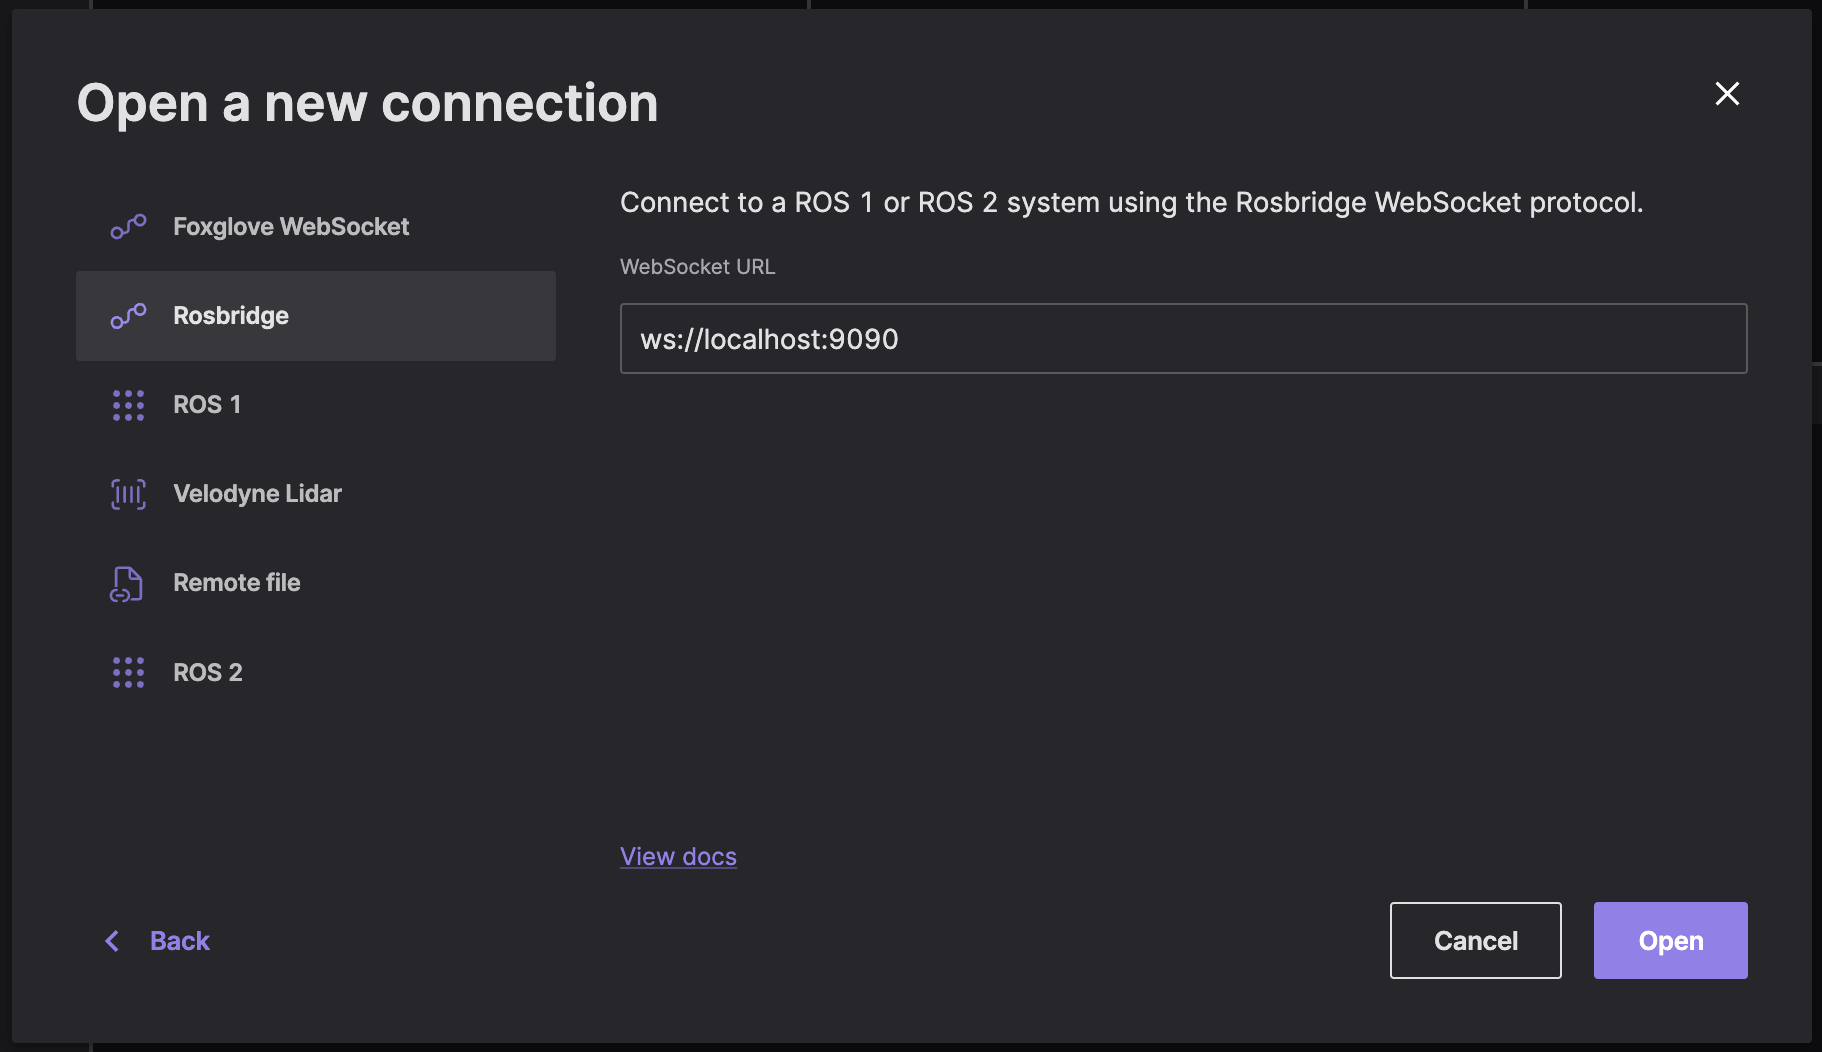
"Open connection" in the "Open data source" dialog, select "Rosbridge", then enter the URL to your Rosbridge server:
To test your connection, open the sidebar to verify that Foxglove is receiving your data source's topics.
限制
Rosbridge 连接支持�发布回您的 ROS 堆栈,但不支持读取或设置 ROS 参数。
原生
Desktop app only
注意:Mac 的 Docker 不会将所有容器端口暴露给 macOS 主机,因此不支持 桥接 或 主机网络。在 Mac 上运行 ROS 时,请使用 Foxglove WebSocket 或 Rosbridge 连接。
通过原生 TCP(传输控制协议)连接直接连接到正在运行的 ROS 堆栈,以直接访问您的 ROS 主节点和/或节点。
一旦您在计算机上有一个工作正常的 ROS 1 设置,在终端中运行 roscore 以启动您的 ROS 主节点。
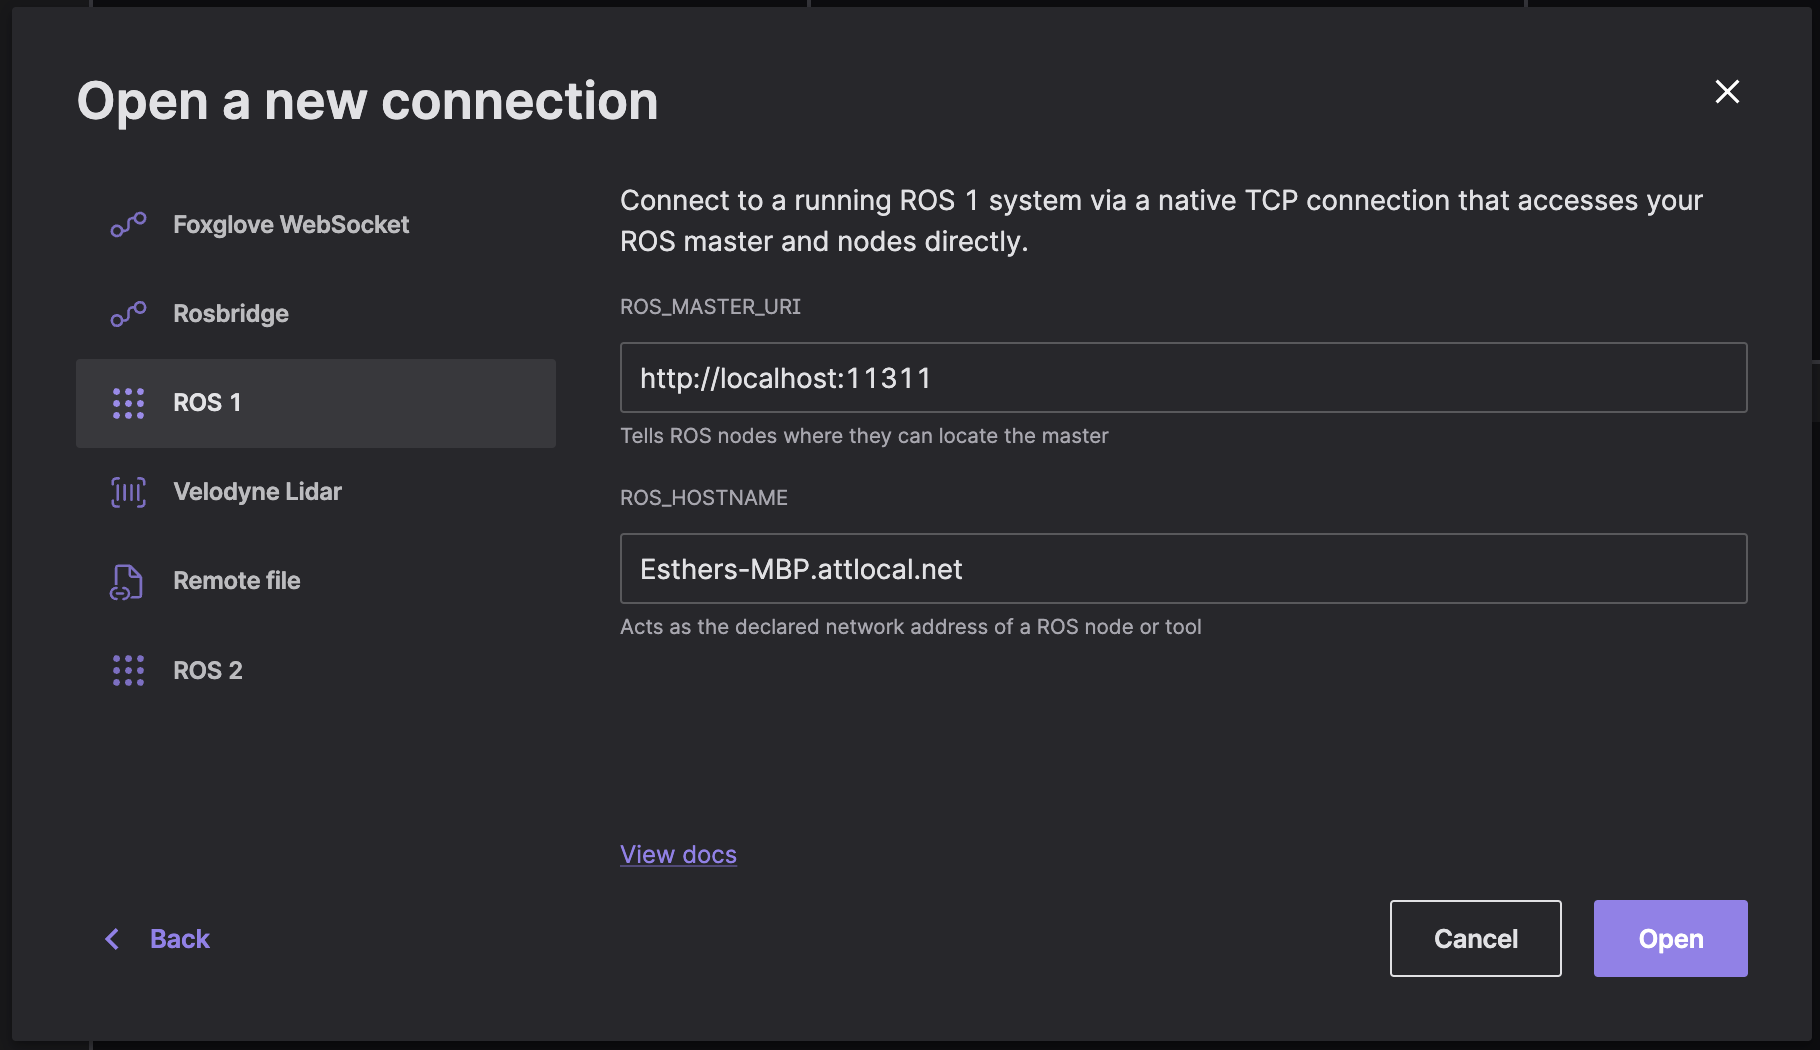
在“打开数据源”对话框中选择“ROS 1”,然后输入您的 ROS_MASTER_URI(ROS 主节点的 IP 和端口)和 ROS_HOSTNAME:
如果您遇到任何问题,请确保您的 ROS 堆栈和 Foxglove 之间有不受限制的网络连接,因为 ROS 使用多个端口进行通信。
如果您在不同的机器上运行 ROS 和 Foxglove,请参阅 ROS 1 网络设置 文档,以确保您的环境配置正确。
远程文件
在“打开数据源”对话框中选择“远程文件”,然后输入远程 .bag 文件的 URL。
Check out the directions for setting up CORS to load remote data files into Foxglove.
本地数据
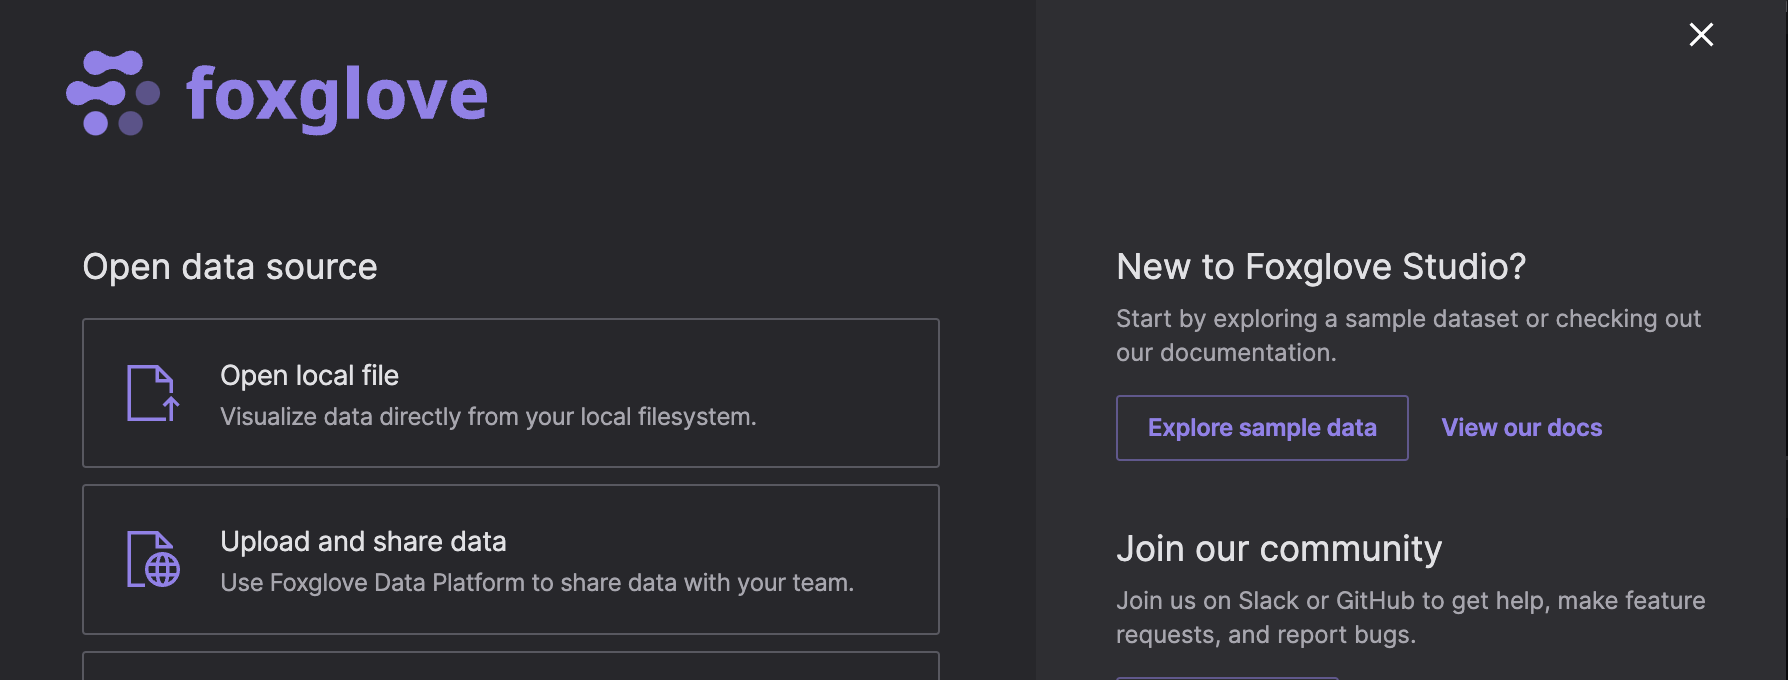
To load a local file for visualization, you have several options:
- Double-click the file from your file manager
- Drag-and-drop the file into Foxglove directly
- "Open local file" in the "Open data source" dialog to select a file from your filesystem
导入数据
After importing data to Foxglove, select individual resources to "Visualize" on the Recordings or Events pages:
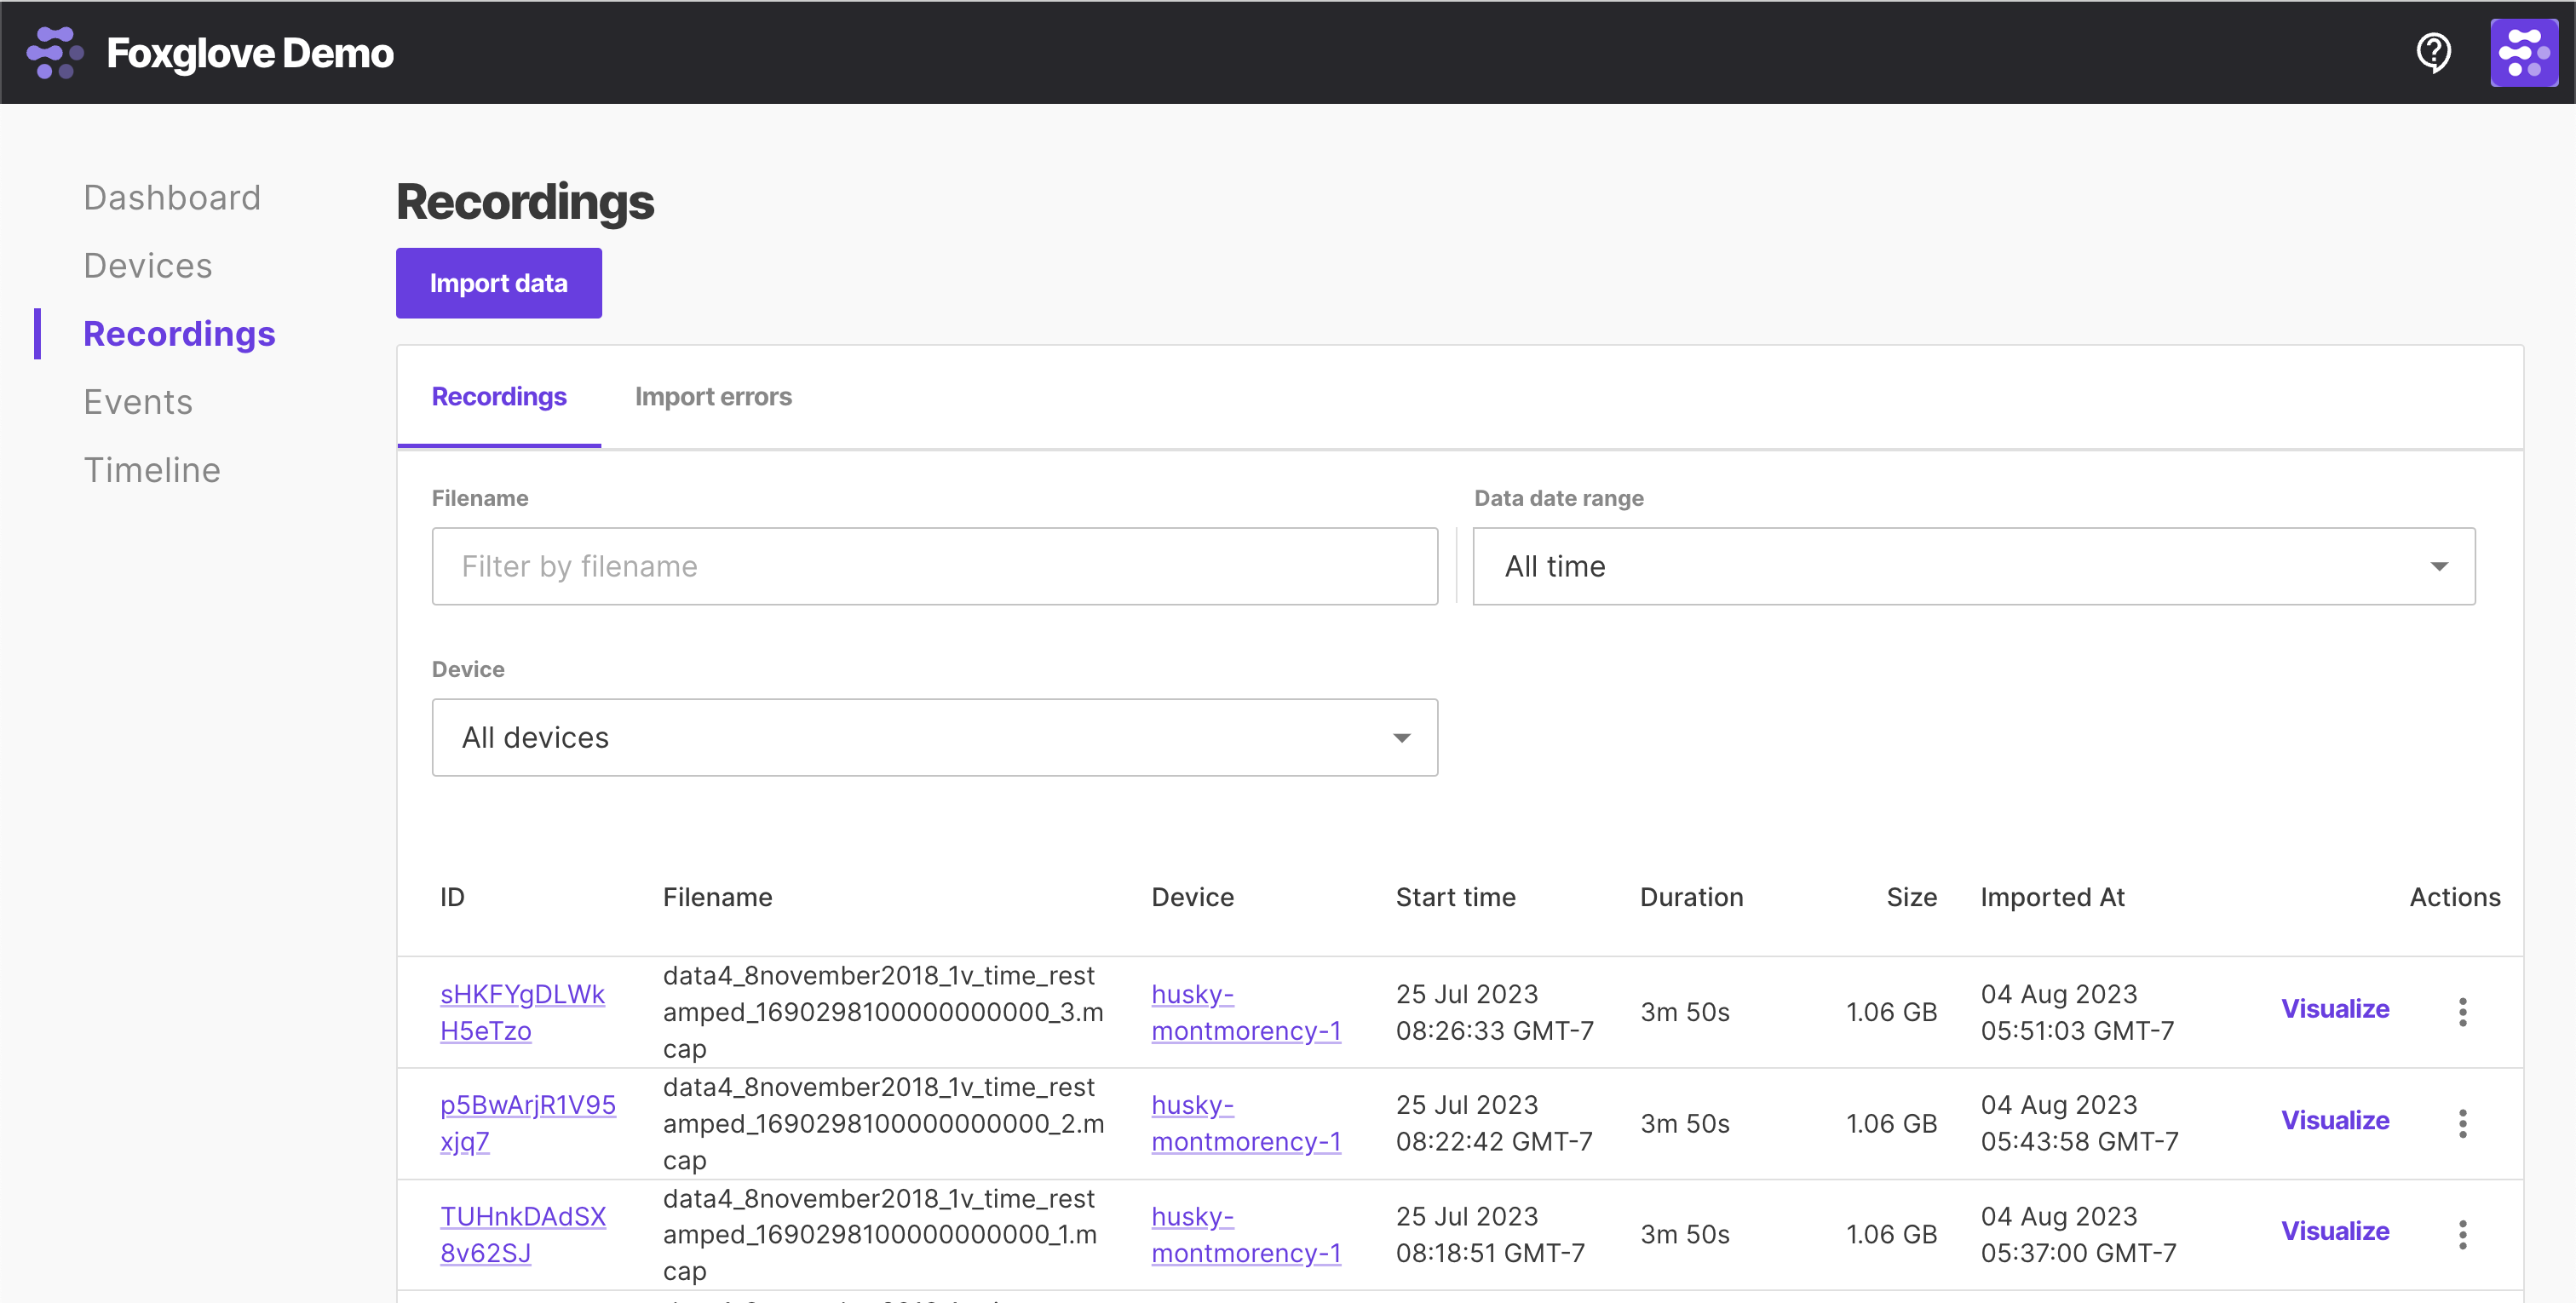
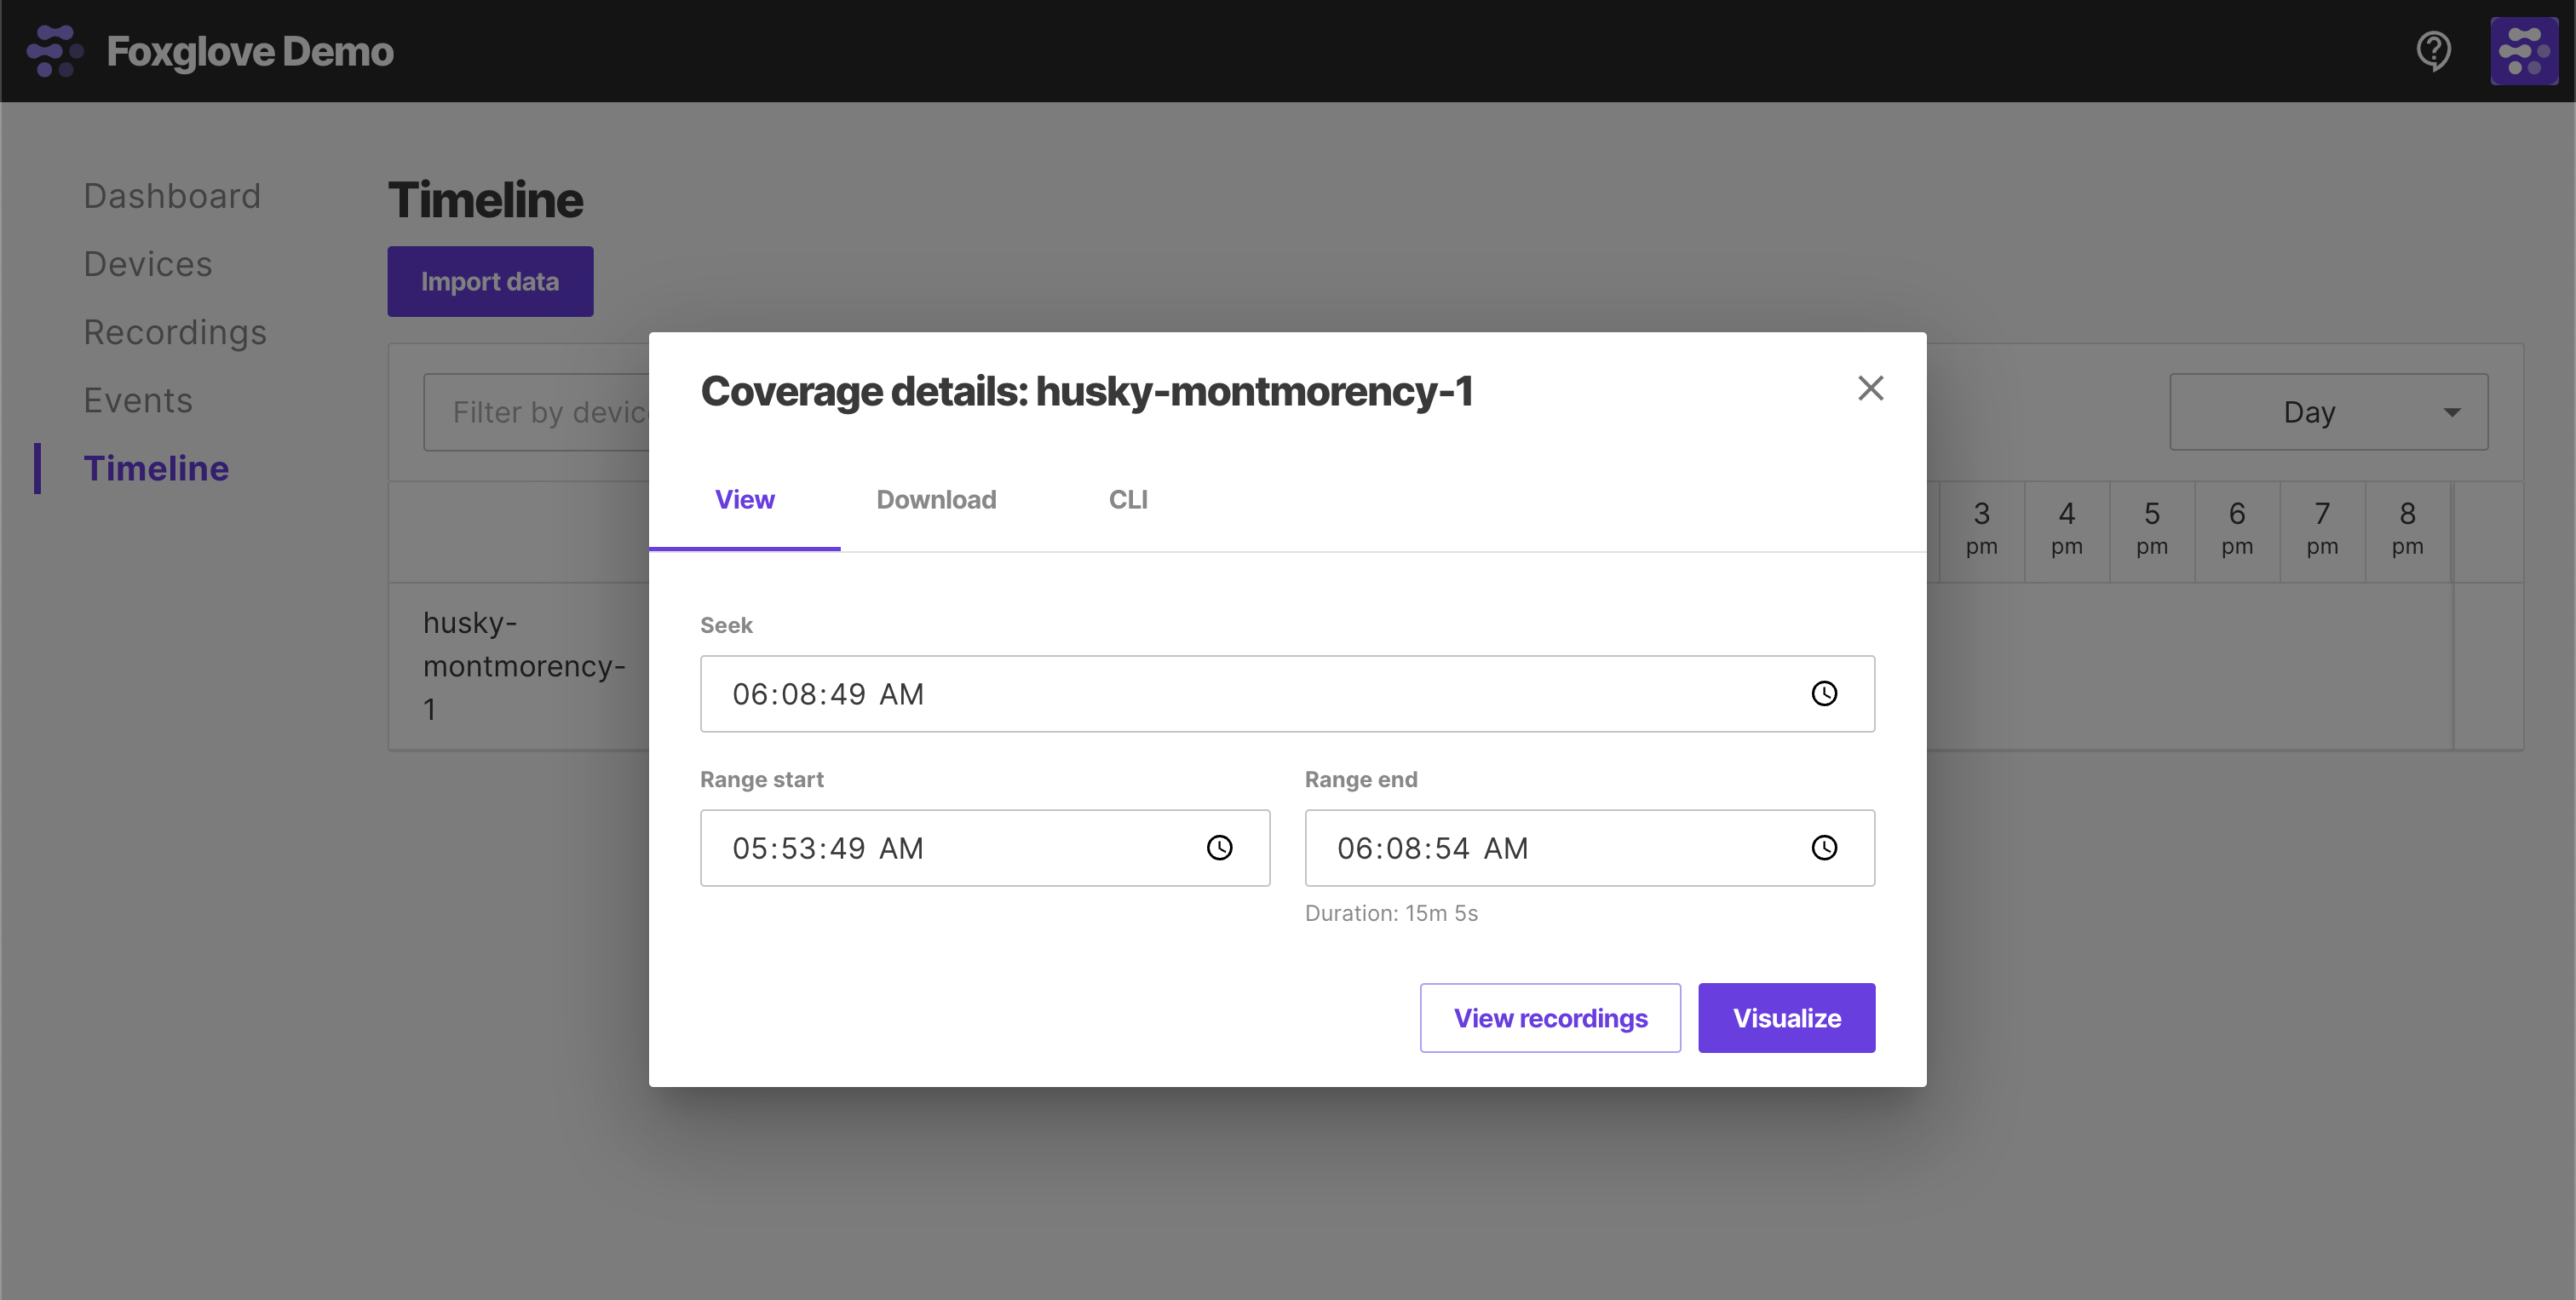
Select a custom time range of data (can span multiple recordings or events) to "Visualize" on the Timeline page: